Hearing that grinding, clicking sound when you turn the key? Yeah, that's not good. It probably means your car's starter motor is on its way out, and that can be a real pain. Nobody wants to be stranded, especially when you’re just starting out on your driving journey.
Knowing how to tackle simple repairs like this isn't just about saving money; it's about feeling confident and in control of your car. When you understand how things work under the hood, you're less likely to panic when something goes wrong and more likely to make smart decisions on the road. That confidence translates directly into safer driving habits.
Here’s a useful habit to develop: Always listen closely to your car. Weird noises, changes in how it feels – those are your car’s way of telling you something's up. Pay attention, and you can often catch small problems before they become big, expensive ones.
Gathering Your Tools and Safety Gear
Okay, let's talk about what you'll need. Replacing a starter isn't rocket science, but youdoneed the right tools to avoid frustration (and potential injury!). First, safety glasses are a MUST. No exceptions. You don't want anything flying into your eyes while you're working. Next, grab a good set of wrenches and sockets – metric is the most common for newer cars. You'll also want a ratchet, maybe a socket extension or two, and possibly a breaker bar if those bolts are stubborn. A floor jack and jack stands are essential for safely lifting your car. And finally, a set of gloves will protect your hands from grease and grime. Oh, and don’t forget your car's repair manual or an online guide specific to your car's make and model. This will be your roadmap.
Before you start anything, disconnect the negative terminal of your car's battery. This is super important to prevent electrical shocks. Trust me, you don’t want to skip this step. Tuck the negative cable away so it can’t accidentally touch the battery terminal.
Finally, gather everythingbeforeyou start. Nothing is more annoying than getting halfway through and realizing you're missing a crucial tool. Lay everything out neatly so you can easily find what you need. It’s all part of developing those safe habits behind the wheel and in the garage.
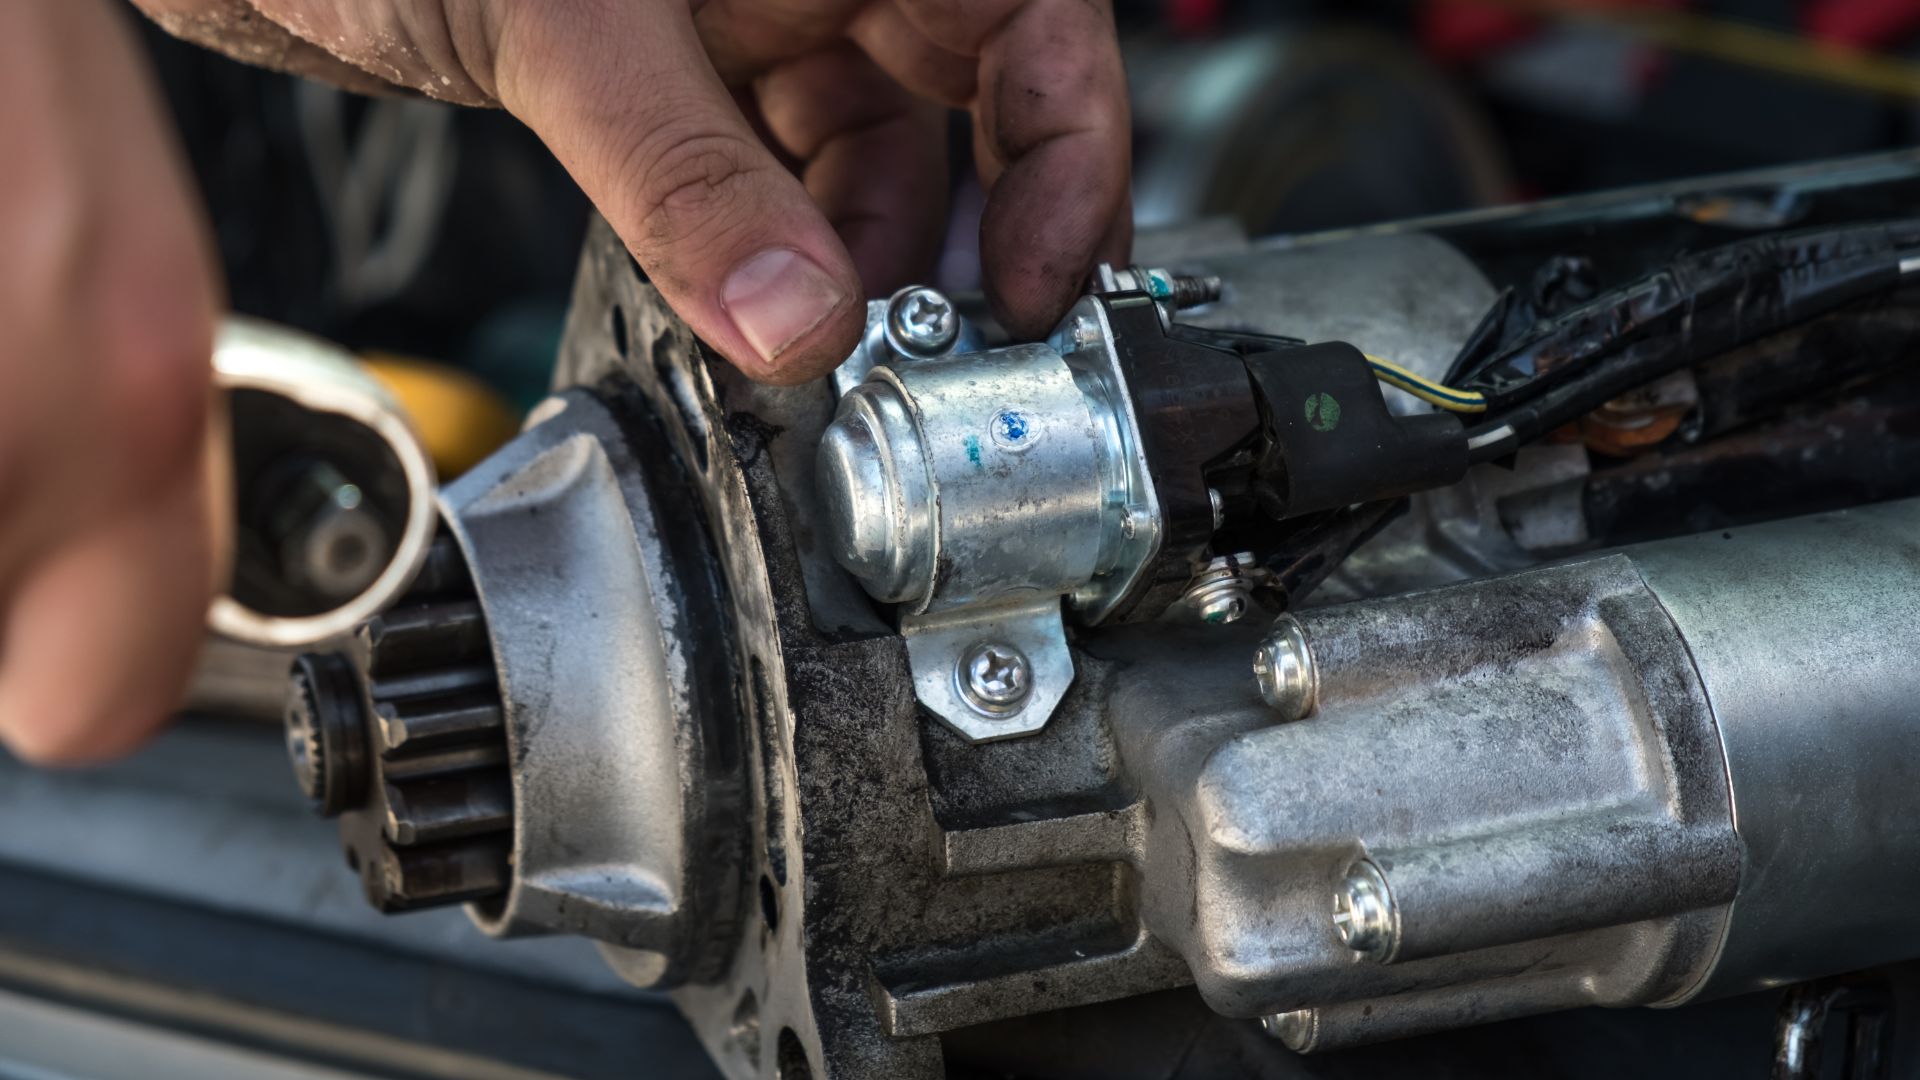
Locating the Starter Motor
The starter motor is usually bolted to the engine block near the transmission. It's a cylindrical device with a small gear (called the pinion gear) that engages with the flywheel or flexplate to crank the engine. The exact location can vary depending on your car's make and model, so consult your repair manual or an online guide for specifics. Sometimes, you'll need to crawl under the car to spot it. Other times, it's more accessible from above.
Take a good look at how the starter is connected. Notice the wiring – there’s usually a thick cable connected to the solenoid (that’s the smaller part attached to the starter) and one or two smaller wires. These wires provide the signal from the ignition switch to activate the starter. Before you disconnect anything, take a picture with your phone! This will be a lifesaver when it comes time to reconnect everything correctly. Trust me, you'll thank yourself later.
Where can I find a good repair manual for my car?
Check your local auto parts store. They often carry repair manuals specific to different makes and models. You can also find digital manuals online through subscription services or individual purchases. Websites like Chilton and Haynes are popular options. Just make sure you get a manual that covers your car's year, make, and model.
Removing the Old Starter Motor
Now for the fun part! With the battery disconnected and the starter located, you're ready to remove the old unit.
1.Disconnect the Wiring: Carefully disconnect the wires from the starter solenoid. Remember that picture you took? Use it now! Usually, these wires are held on with nuts or bolts. Make sure you use the correct size wrench to avoid stripping the fasteners.
2.Remove the Mounting Bolts: The starter is held in place by one or two bolts that thread into the engine block or transmission housing. These bolts can sometimes be pretty tight, so you might need to use a breaker bar for extra leverage. Before removing the last bolt completely, support the starter with your hand or a small jack to prevent it from dropping.
3.Remove the Starter: With the bolts removed, carefully wiggle the starter free from its mounting location. It might be a snug fit, so be patient and persistent. Once it's free, lower it to the ground.
Take a moment to compare the old starter to the new one. Make sure they look the same and that the mounting points and electrical connections are in the same locations. If anything looks different, double-check the part number to ensure you have the correct replacement.
Installing the New Starter Motor
Installation is essentially the reverse of removal.
1.Position the New Starter: Carefully position the new starter motor into its mounting location. Make sure it's aligned properly with the engine block or transmission housing.
2.Install the Mounting Bolts: Install the mounting bolts and tighten them by hand first. Then, use a wrench or socket to tighten them to the manufacturer's recommended torque specification. This is important to ensure the starter is securely mounted and won't vibrate loose.
3.Reconnect the Wiring: Reconnect the wires to the starter solenoid, using the picture you took earlier as a guide. Make sure the connections are clean and tight. Loose connections can cause all sorts of problems.
4.Double-Check Everything: Before you reconnect the battery, take a final look to make sure everything is properly connected and tightened.
How important is it to use a torque wrench when installing the starter?
Using a torque wrench is very important! Over-tightening the bolts can damage the threads in the engine block or transmission housing, which could lead to costly repairs. Under-tightening them can cause the starter to come loose, leading to vibrations and potential failure. A torque wrench ensures that the bolts are tightened to the correct specification, providing a secure and reliable connection.
Testing the New Starter Motor
With the new starter installed, it's time to test it out!
1.Reconnect the Battery: Reconnect the negative terminal of your car's battery.
2.Start the Car: Get behind the wheel and turn the key. If everything is working correctly, the engine should crank over smoothly and start right up.
3.Listen for Any Unusual Noises: Pay close attention to how the starter sounds when it engages. If you hear any grinding, clicking, or other unusual noises, there may be a problem with the installation or the new starter itself.
If the car doesn't start, don't panic! Double-check all your connections and make sure the battery is fully charged. If you're still having trouble, consult your repair manual or seek help from a qualified mechanic. Sometimes, even new parts can be faulty.
Troubleshooting Common Starter Problems
Even with a new starter, things can sometimes go wrong. Here are a few common issues and how to troubleshoot them: Clicking Sound, No Cranking: This usually indicates a weak battery, loose connections, or a faulty starter solenoid. Check the battery voltage and make sure all the connections are clean and tight. Engine Cranks Slowly: This could be due to a weak battery, thick engine oil (especially in cold weather), or a partially seized engine. Try jump-starting the car or using a thinner oil. Starter Spins But Doesn't Engage:This usually means the starter pinion gear is not engaging properly with the flywheel or flexplate. This could be due to a faulty starter solenoid or worn pinion gear.
What are some early warning signs that my starter motor might be failing?
Keep an ear out for a few telltale signs. A slow or labored cranking sound when you try to start the car is a common indicator. Also, listen for a clicking sound without the engine turning over. Sometimes, the starter might work intermittently, starting the car sometimes but not others. These are all clues that the starter is nearing the end of its life.
Keeping Your Car Running Smoothly: Learner’s Permit Tips and Beyond
Maintaining your car goes beyond just replacing parts. Regular maintenance, like oil changes, checking fluid levels, and inspecting brakes, is crucial for keeping your car running smoothly and safely. Developing good driving habits, like avoiding hard acceleration and braking, can also extend the life of your car. Parent-supervised driving is a great way to gain experience and learn these essential maintenance practices. Think of it as part of your first-time driver checklist – a way to build confidence and reduce driving anxiety.
Remember those parallel parking basics? Practicing those maneuvers and staying calm under pressure are just as important as knowing how to change a starter. It's all about building a foundation of knowledge and skill that will serve you well on the road.
You did it! You've successfully replaced your car's starter motor. That's a huge accomplishment, and you should be proud of yourself. The more you learn about your car and how it works, the more confident and capable you'll become behind the wheel. And that confidence is the key to becoming a safe and responsible driver. Keep learning, keep practicing, and keep exploring the world behind the wheel! You've got this.